How to Project Balances and Cash Flow
Projected balances and cash flow
Thank you for choosing Quicken!
Do you have a have a general idea of where you stand financially? Accompanied by a sinking feeling you’re spending more than you’re taking in? Quicken can help! By understanding how much money comes in and where it all goes—in other words, your cash flow—you can plan realistically and avoid the paycheck-to-paycheck struggle to make ends meet.
How does Quicken help with cash flow? It’s pretty simple: just tell Quicken which accounts you spend from, what your bills are, and when you expect income; it can then remind you when your bills are due, and project your spending account balances into the future. Wow! This can help you avoid late fees and overdraft charges, and perhaps put some of that “extra money” you might find into your savings account. Sound good?
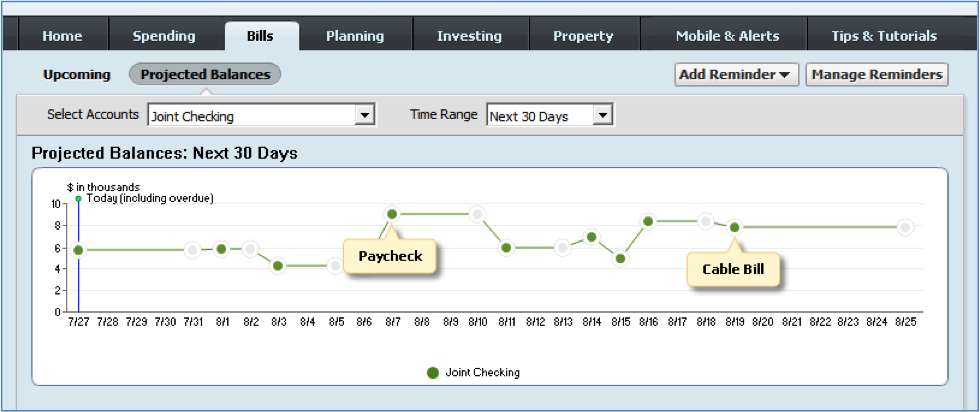
Here’s the Projected Balances graph, one of the tools you’ll learn about in this guide:
The Projected Balances graph displays a forward-looking estimate of the total amount of money in your spending accounts, plotted against time. Using it you can see when you’ll have money, when you won’t, and when you might need to think of creative ways to “smooth the graph out” so you don’t end up underwater before your next paycheck.
Just follow along and we’ll show you how add your spending accounts, create reminders for your bills and income, and use the Projected Balances graph.
Afterwards, if you decide that you want to learn more about tracking your cash flow in Quicken, we’ll show you how to categorize your transactions, check your cash flow using a pie chart and a report, and where to find other great cash flow features in Quicken.
Let’s get started!
Add your spending accounts
To project your account balances and get an accurate picture of your cash flow, you’ll need to create accounts in Quicken for all of the real-world accounts you normally spend money from—most likely, your primary checking account and your credit cards. Just click the Add an Account button at the bottom of any Quicken window to create these accounts. Also, if you’re just getting started with Quicken, here’s a quick tour of the controls you’ll use most often:
- Click the
 icon to download new transactions
 - Click the
 icon to open the Account List, where you can edit your account names and make other changes.
 - Click the tabs to access tools and features organized around common financial activities.
- Click the Account Actions icon at top right for a menu of tasks, preferences, and reports related to the account you are working with.
- Click an account name in the Account Bar on the left side menu to open its register.
- The Account Bar is a list of the accounts you’ve added to Quicken.
- A register is a list of transactions within an account.
- Click a transaction in a register to make changes, or click a blank line to enter a new transaction.
- Click Add an Account at the bottom left to set up your accounts.
- Click Help to connect with other Quicken users in our Live Community forum.
Create reminders for your bills and income
Chances are your bills don’t all arrive on the same day. They trickle in, and you try to pay each one in a timely fashion. To save time and effort, you can have Quicken remind you when a bill is due, then you can pay the bill the way you usually do: with a check, an online payment, or a direct withdrawal.
Also remember to tell Quicken about your income, and when you expect it. Then when payday comes around, Quicken can enter your paycheck in the register automatically. Of course you may need to make a few adjustments to the amounts, but entering at least an estimate of your paycheck is important if you want to use the Projected Balances graph. We’ll talk more about that later in this guide.
Create reminders for your bills and income
When you create a bill reminder, you enter the details of the bill and tell Quicken when to make the next payment, the amount due, and how often to make future payments. Here’s how:
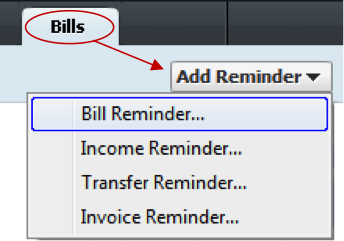
1. Click the Bills tab, and then choose Add Reminder > Bill Reminder.
2. In the Pay to field, type the name of the payee and then click Next.
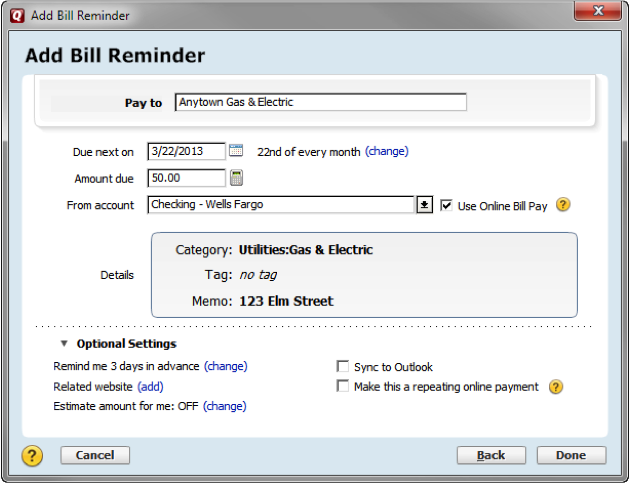
3. Use this menu to tell Quicken when the bill is due, the amount, how often you need to pay it, and which account to draw the funds from. Fill in the rest of the information, as necessary. If you need assistance, click the Help icon.
Tip: If you want Quicken to estimate future bill amounts, click (change).
Project your account balances
When you finish setting up your scheduled bill and income reminders, Quicken can project your spending account balances into the future. No time travel required, we promise!
Here’s how it works: Quicken projects your balances based on your current account balance, future transactions that you’ve already entered into your register, and future scheduled bill and income reminders. If you’ve been following along, you should be all set up.
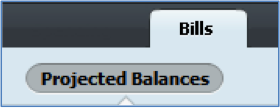
To view the Projected Balances graph:
1. Click the Bills tab, and then click the Projected Balances button.
2. Use the filters at the top of the graph to select the spending accounts and time range you’re interested in. Be sure to include the account you pay your bills out of.
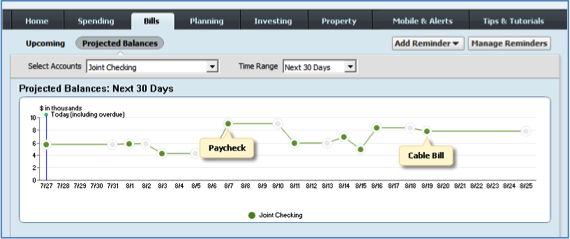
About the graph points:
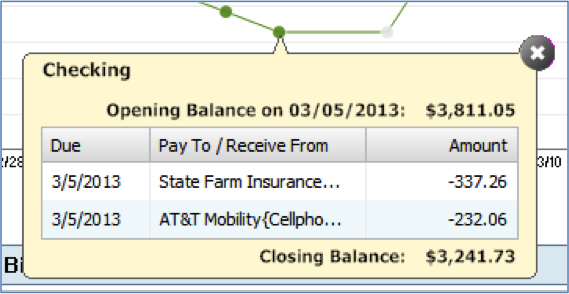
A green dot marks a date on which you have transactions that maintain a positive account balance. Click a green dot to see them.
A yellow triangle marks a date on which you have transactions that create a negative account balance. Click a yellow triangle to find the cause.
Short on cash?
Do you see yellow triangles? If you find yourself short on cash month after month, it’s probably time to admit that you’re over-spending. Don’t get discouraged! Categorize your transactions and use the spending pie chart and cash flow report to take a long hard look for opportunities to cut back. You can do this!
Categorize your transactions
Whether you download your transactions from your bank, or enter them into your register by hand, categorizing your transactions helps you see where your money goes. Categories are simply labels that track how much you’re spending on particular items, such as rent, groceries, or dining. The good news is that if you download your transactions, Quicken does most of this work for you—automatically!
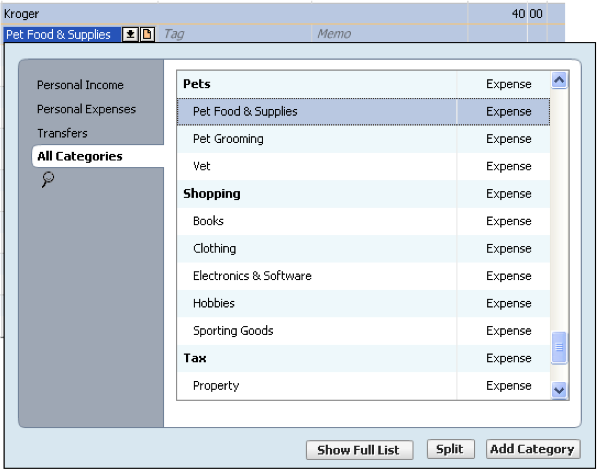
For example, if you used your ATM card at Kroger, Quicken knows that Kroger is a grocery store and it automatically assigns the category Food & Dining:Groceries to the transaction.
In most cases, Quicken can accurately guess the category. In some cases, it won’t recognize the transaction the first time it sees it—for example, your rent check. Quicken also might assign a category to a transaction that you don’t want—for example, during that trip to Kroger you may have bought pet food, which you want to track under the category Pets:Pet Food & Supplies instead of Food & Dining:Groceries. Naturally, you’ll want to assign the correct categories to your transactions.
The steps below show you how to use the Spending tab to assign a category to a transaction. The process is identical if you use an account register. However, a key advantage of occasionally visiting the Spending tab is that it alerts you if you have any uncategorized transactions. Nice!
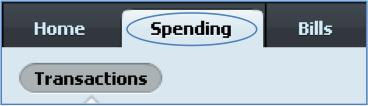
1. Click the Spending tab. The Spending tab shows you the transactions from your spending accounts.

2. Click the transaction that you want to change the category for.
3. Click the button with the arrow pointing dow to the line next to the category you want to change.
4. Click the category you want from the list.
5. If you don’t see it at first, just start typing its name and Quicken will find it.
Tip: If the category you want isn’t in the list, click the Add Category button.
Check your cash flow
Categorizing your transactions may seem like busy work, but the payoff is huge! Quicken can easily display, sort, report, and filter your categories and transactions any way you want to show you where all that money goes. Here’s how:
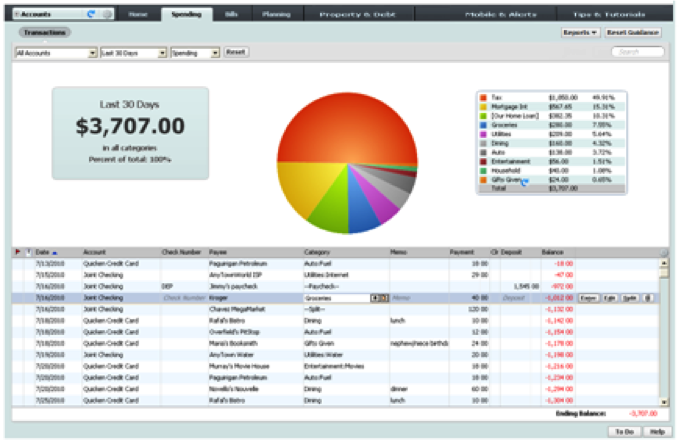
Using the Spending tab:
1. Click the Spending tab.
2. Use the filters at the top of the window to change the accounts, time period, and type of transactions (spending or income) you want to see.

3. Click a slice in the pie chart to see a summary of your spending within a category.
In this example, the Household category slice was clicked. Displayed at the right is the amount spent on household items, including subcategories!
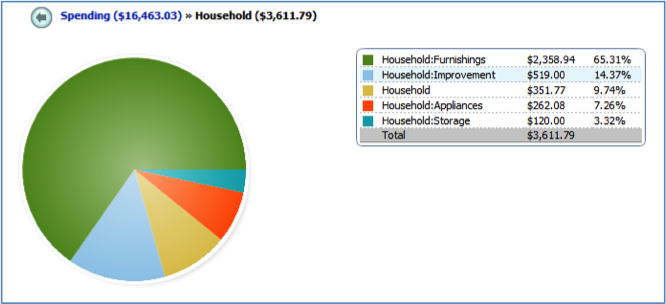
4. When you click a slice, the list of transactions below the pie chart changes to show only the transactions in that category. Using the list you can easily change the categories and payees assigned to your transactions.
Using a cash flow report:
You can also use a cash flow report to see where your money goes. A cash flow report can reveal interesting patterns in your expenses.
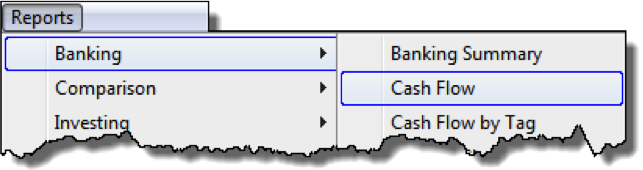
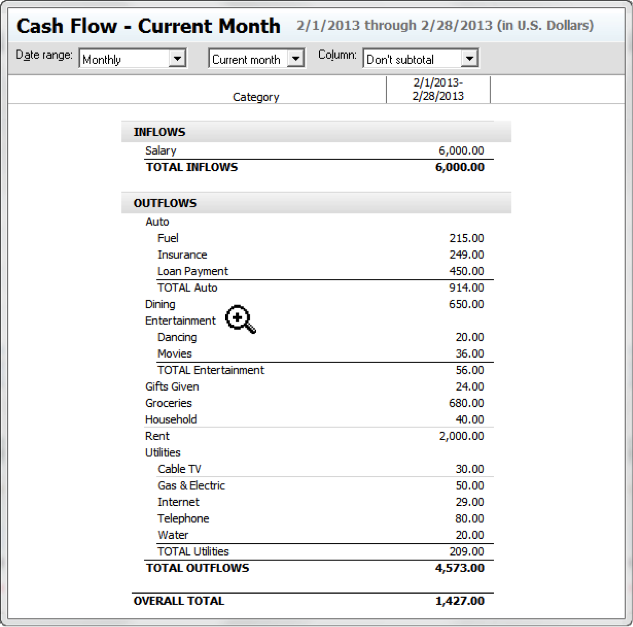
1. Choose Reports menu > Banking > Cash Flow to take a look at your inflows vs. outflows.
2. Here is a typical cash flow report.
- See any surprises when you run yours? What are your biggest expenses?
- How many hours did you work to pay for your car? For housing? Dining?
- Do your expenses reflect the value of your labor? A reality check like this can point out how your spending reflects what matters to you. Is it time to make changes?
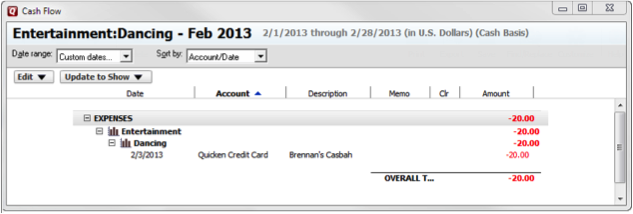
3. Move your cursor over the report. The cursor turns into a magnifying glass when details are available.
4. Double-click to zoom in on the details.
In this example, Entertainment was double-clicked, revealing the single transaction in that category.
Explore other cash flow features
Also check out the Debt Reduction Planner (Click the Planning tab > Debt Reduction button.) and the Budgets feature (Click the Planning tab > Budgets button.). These great tools can help reduce your credit card debt and bring your expenses in line with your income.
Get help when you need it
We want to make sure you get the help you need. If after reading this guide you have questions, you can turn to the following resources.
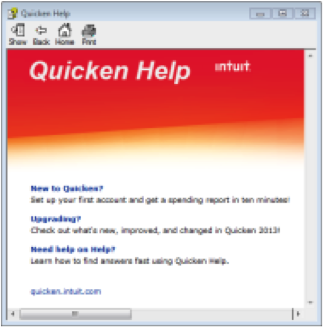
Quicken Help
Includes explanations about how features work and steps on how to do most tasks. From the Help menu, choose Quicken Help.
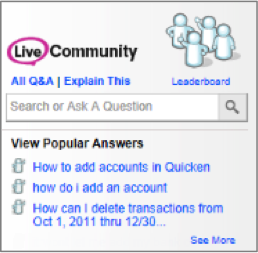
Quicken Live Community
An online forum where you can get answers from other Quicken users and experts. Click the Help button in the lower right of Quicken. You can also access Live Community at qlc.intuit.com.
Quicken Support
If you run into a bug or other malfunction in Quicken, contact Support at quicken.com/support.
McGraw Hill’s Quicken: The Official Guide
Offers a more thorough intro to Quicken and all of its features. Available at many bookstores and online.
Thank you again!
We sincerely hope this short guide gets you up-and-running with Quicken. We really appreciate your business and work hard every day to make Quicken the best personal finance solution on the market.
The Quicken Team
Quicken has made the material on this blog available for informational purposes only. Use of this website constitutes agreement to our Terms of Use and Privacy Policy. Quicken does not offer advisory or brokerage services, does not recommend the purchase or sale of any particular securities or other investments, and does not offer tax advice. For any such advice, please consult a professional.


