Quicken Product Highlights January 2021
This month we would like to highlight our bill tracking tools. Our bill tracking tools give you the opportunity to view all of your paid and upcoming bills in a single place.
You should treat bill tracking as a “To Do” list, letting you know what needs to be paid and when. Tracking your bills also helps you use the projected balances and cash flow features in Quicken. The projected balance feature, which is available in both Windows and Mac, has a graph so you can see exactly when your balance would drop below zero. If you’re also tracking income, you can see whether the trend of income vs. bills is going up or down.
Bill Tracking with Quicken for Windows
If you’ve never added a bill before, you’ll see a section on your Home tab called Stay on Top of Monthly Bills. You can also start directly from the Bills & Income tab. From either location, select the Get Started button and Quicken will walk you through the process of adding your bills.
Your first choice will be between an Online Bill and a Manual Bill. If you can access your bill from a web site (Most financial institutions, credit cards, utilities, services) then select Online Bill. If you pay someone directly using a check or other means, select Manual Bill. Select Next under your preferred method and follow the remaining steps.
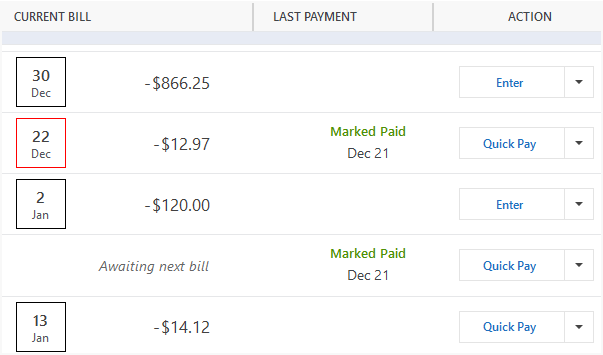
Once you’ve added your bills, you can view your upcoming bills in a list. The list contains due dates, amounts, and payment status. When you have paid a bill, select Mark as Paid from the Action column.
Bill Tracking with Quicken for the Mac
To get started, select Bills & Income from the top menu, then select + New Bill. You will have the option to Pay or Track. Select Track.
Once you select Track, you’ll need to choose between eBill or Other Bill or Income. If you can access your bill over the web (Most financial institutions, credit cards, utilities, services) then select eBill. If you pay your bill via check or in person, choose Other Bill or Income. You’ll then provide the information Quicken needs to track your bill.
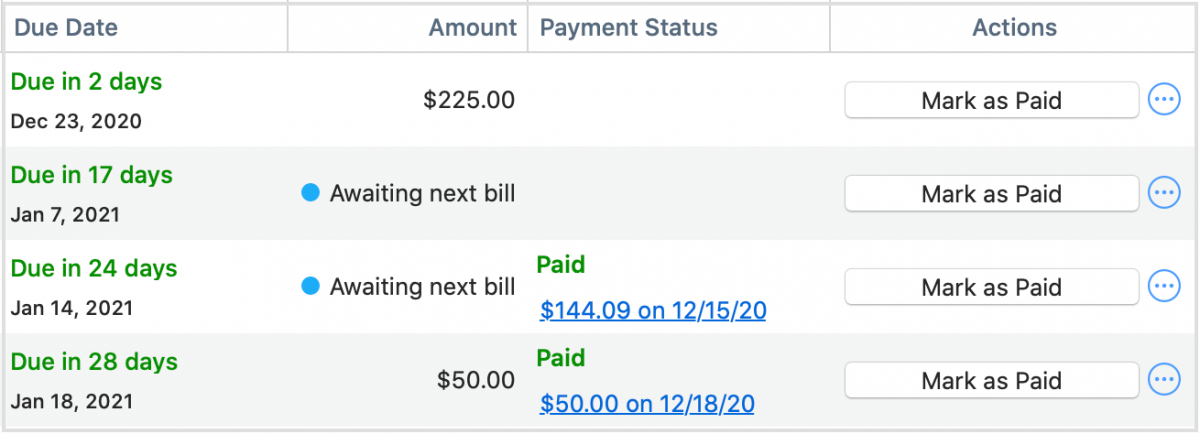
Once you’ve added your bills, you can view your upcoming bills in a list. You’ll see your dues dates, amounts, and payment status. When you have paid a bill, select Mark as Paid. You can then see at a glance what has and has not been paid.
Tracking where your money goes
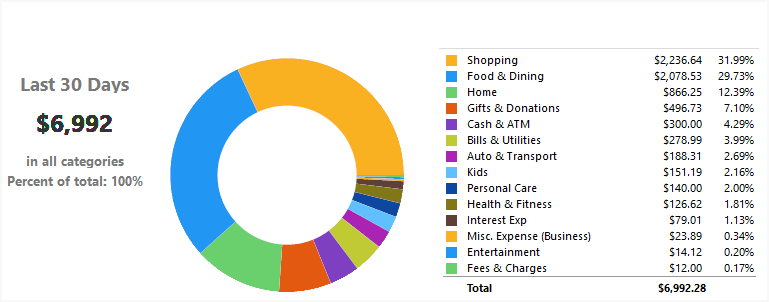
You can use the Spending tab to track where your money is going. Quicken displays both a graph of your spending, and a list of your spending categories that shows both the amount spent in the category and the percentage of your total spending that you spent in that category. This is why it is important to take the time to review and categorize every transaction. The more time you spend on categories, the better your spending analysis will be.
To get more information about your spending, select a category in either the graph or the list. When you select a category, you will see a list of all the transactions in that category. You will also see a list of the sub-categories of spending for that category. For example, selecting Shopping from the main graph displays all the sub-categories you spent in, such as Hobbies, Books, and Clothing. You can also adjust your dates to view spending by different spending periods.
The key to getting useful information about your spending, is to properly categorize your bills. Be sure to go through each bill. Many users keep their receipts from their transactions. Doing this makes it easier to Split Transactions. Splitting a transaction means assigning parts of the total amount to different categories. For example, a single receipt from a supermarket may contain Groceries, Clothing, Toys, and a Gift. By going through your receipts, you’ll get the most accurate information about your spending.
Beyond the Spending tab, you should also take advantage of Reports. From the Reports menu, you can choose several reports that analyze your spending. One excellent report to look at is Spending by Payee. This report lets you see who your money is going to. Knowing where you spend your money, especially discretionary income, can help you change behaviors and adjust budgets.
Quicken has made the material on this blog available for informational purposes only. Use of this website constitutes agreement to our Terms of Use and Privacy Policy. Quicken does not offer advisory or brokerage services, does not recommend the purchase or sale of any particular securities or other investments, and does not offer tax advice. For any such advice, please consult a professional.

