Quicken Product Highlights November 2020
One of the main reasons Quicken software wins awards is how much you can customize it to meet your needs. You can change your entire category structure however you like. You can create naming rules for your favorite stores so you’re not stuck with the strange transaction names that come from the bank. You can invent your own tags to track your finances in brand new ways. And you can endlessly customize reports to show you exactly what you need to know.
This month, the product team is highlighting another powerful way to make Quicken your own: the unparalleled ability to customize your budgets. In both Quicken for Windows and Quicken for Mac, you can change your budget’s categories, amounts, included accounts, and more. Read on to learn more about customizing your Quicken budgets on each platform.
Getting started with budget customization
If you’re relatively new to Quicken, the first thing you’ll want to do is look through your recent transactions and make sure your categories are set up the way you want them. Quicken automatically assigns categories to your transactions based on the payee. Grocery store purchases are assigned to Groceries, for example. That one’s pretty obvious, but there might be categories you’d like to change to better reflect what the transaction was for. As you update each one, Quicken will give you the option to remember your preference for next time.
Quicken uses your categories as a starting place in creating your budget, calculating your projected spending on things like groceries or entertainment based on your actual spending in each category. Once you’re satisfied that your categories paint a fairly accurate picture of your spending, you can create a budget in Quicken for Windows or Quicken for Mac and customize it to suit your needs.
Quicken for Windows: budget customization
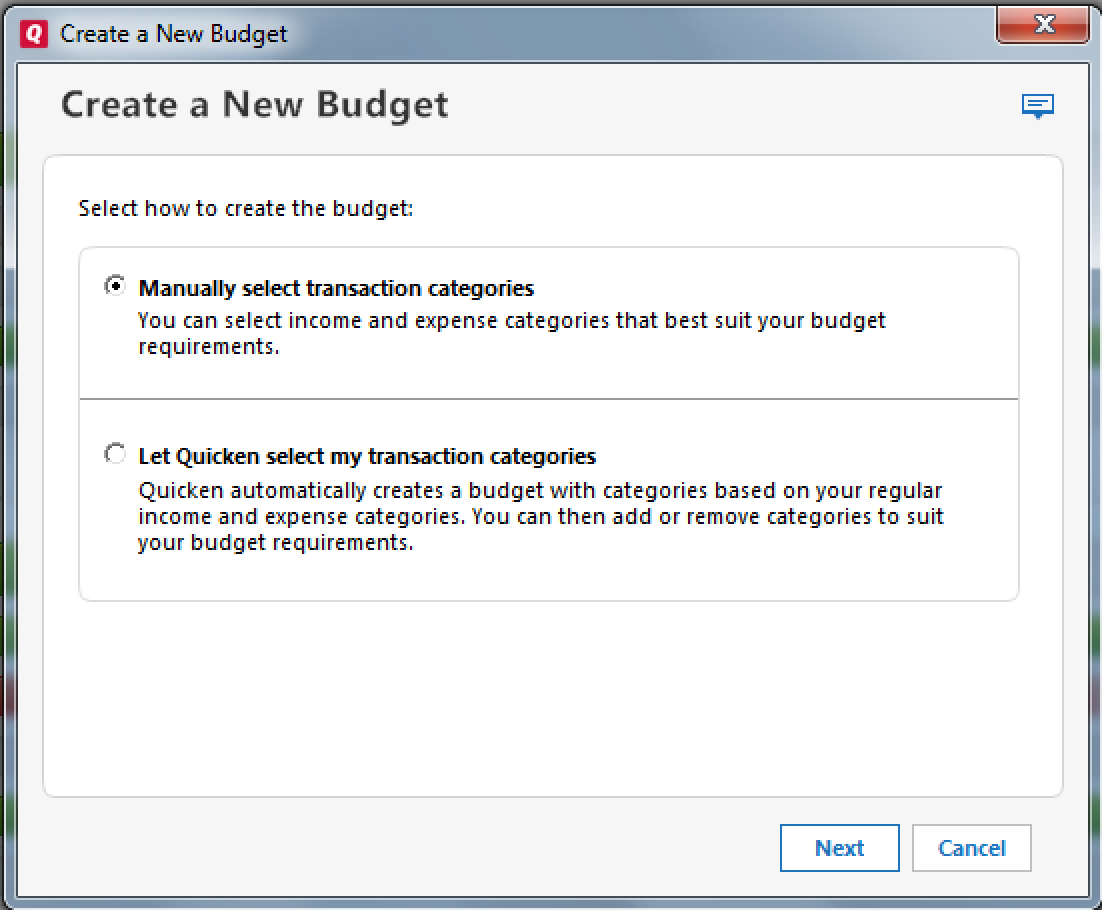
Choose automatic or manual budgeting: When you’re ready to create a budget, you can let Quicken create an automatic budget for you based on your past expenses, or you can build that budget manually by choosing all your categories and setting each amount, creating your budget from the ground up. Most Quicken members start with an automatic budget instead of building one from scratch because you can always change that budget later. Quicken always lets you add, delete, or adjust categories manually, whenever you like.
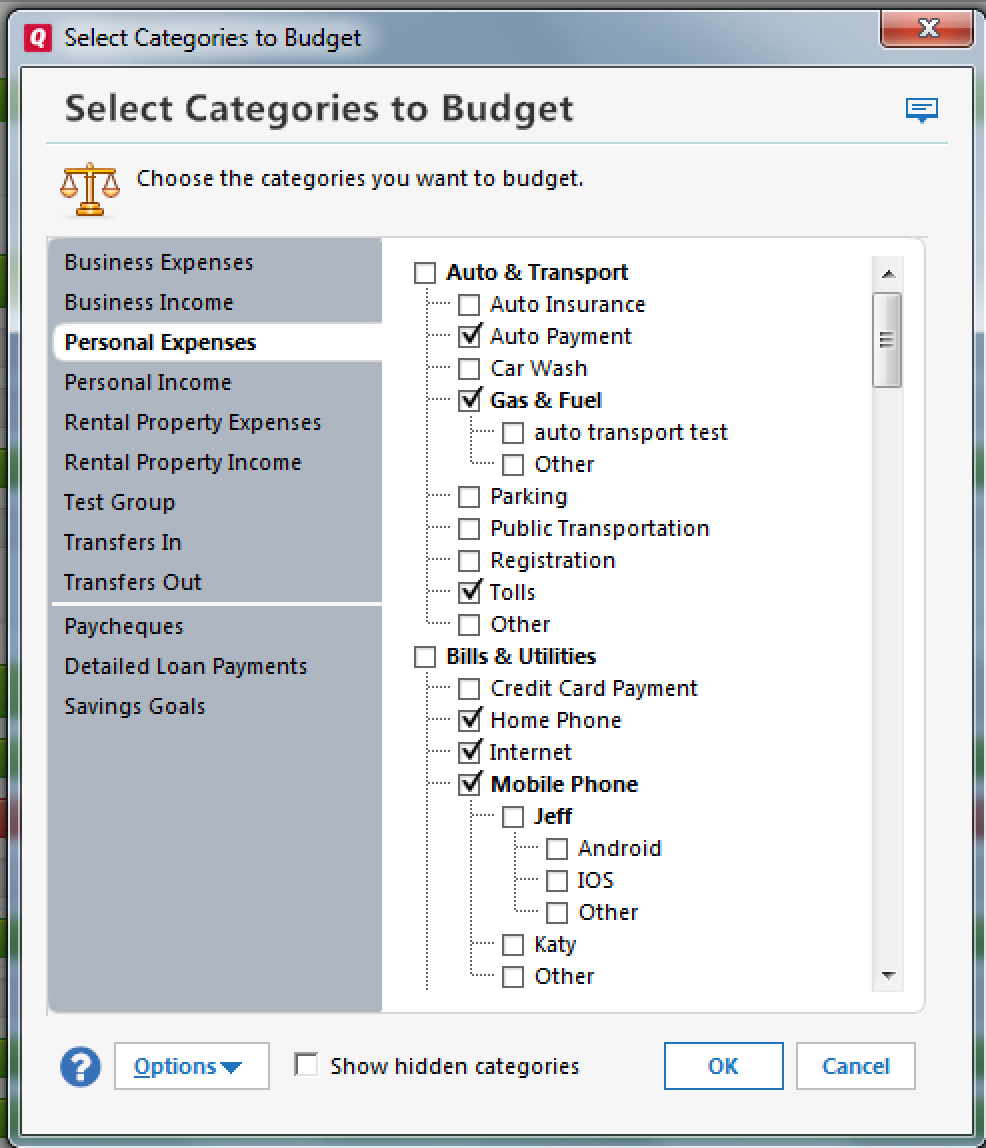
Choose your categories, subcategories, or category groups: You can choose to budget all of your expense and income categories under each category group, or you can pick and choose the ones you want to track. Quicken Home & Business comes with a set of default groups designed to keep your personal and business expenses organized separately:
- Personal expenses
- Personal income
- Business expenses
- Business income
- Rental property expenses
- Rental property income
Every version of Quicken lets you choose the categories and subcategories you want to track in your budget. You can also create custom categories and/or category groups, such as Kids. You can track your paychecks to monitor your net salary. You can track your spending in a few select categories or down to the last dime. You can even track your savings contributions when you transfer money into your savings account to make sure you’re meeting your savings goals.
Choose your view: You can set your budget to any view you like.
- The graph view shows each budget category as a bar. A red bar indicates you’re over budget and a green bar indicates you’re within budget. You can set your graph view to be monthly, quarterly, yearly, quarter-to-date, year-to-date or last year.
- The annual view shows each month of the year’s budget in a tabular format. You can configure that format to show your budgeted amounts, your actual amounts spent, your amounts left to spend, or all three of these.

Choose your accounts: If you like, you can choose to include only specific accounts in your budget. This lets you create separate budgets for your spouse, partner, parents, kids, etc. without affecting your own.
Choose your budget amounts: If you let Quicken create a budget for you, Quicken uses your spending history to calculate the average amount you typically spend in each budget category, but you can always edit these as your needs change.
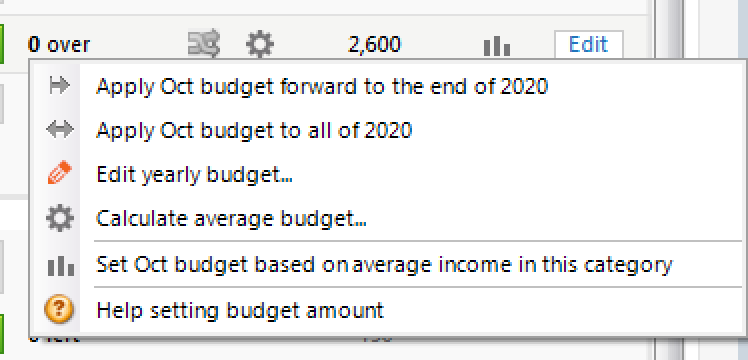
When you’re considering new amounts for your budget, hover over the bar graph or category row to see the average amount you’ve historically spent on that category. Click on the gear icon near each category for some easy ways to adjust your budget amounts:
- Apply that month’s budget amount for that category to the rest of the year going forward
- Apply that month’s budget amount for that category to all the months in the year
- Edit your yearly budget for a quick way to set budget amounts for all months of the year
- Calculate your average spending on that category in different timeframes: day, week, month, etc.
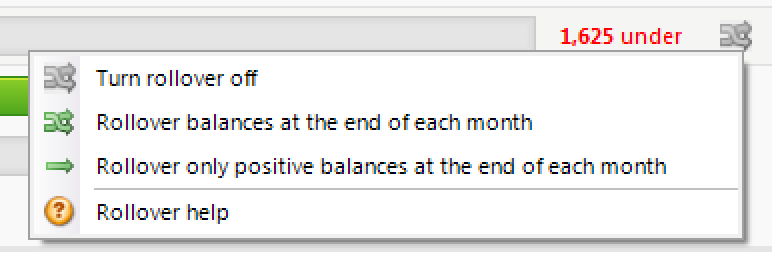
Choose whether to rollover your budget surpluses: If you like, you can configure Quicken to rollover any left-over budget amounts into the next month. For example, if you budget $100 for gasoline each month but you spend only $45 this month, you can rollover the remaining $55 into next month’s budget, giving you $155 to spend instead of the usual $100. You can also choose to rollover all amounts into the next month—not just surpluses but shortfalls too. For example, if you spent $110 on gas in a month budgeted for $100, the next month’s budget would be $90.
Choose more customization options:
- Click on Budget Actions > Budget preferences to include or exclude the following:
- Savings Account to Savings Account transfers
- Savings Account to Savings Goal transfers
- Click on Budget Actions > View Options to customize the following:
- Show cents: See all amounts including cents
- Include reminders: Use this to include or exclude reminders. If you include reminders, then any upcoming bill, income, or transfer reminder set for that category will show up in the budget bar in a faded red or green color to show you what’s coming up, and the reminder amounts will be included in your budget projections.
- Show parent category roll up: Choose this if you want to see how all your subcategory budget items rollup to the parent category. For example, showing parent categories will display your total budget for all Auto expenses as well as your specific budgets for Auto Payments, Gas & Fuel, and so on.
Quicken for Mac: Budget Customization
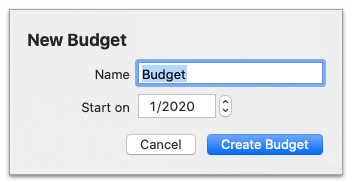
- When you create a new budget, you’ll begin by setting the starting month for your annual budget. Most people pick January, but you can pick any month you like. Some people might choose the month when they purchase Quicken, or they might choose a fiscal calendar for their business.
- Quicken automatically creates a budget for you based on your historical spending in a number of categories.
- You’ll probably want to customize this budget to better match your needs. Click Edit Budget to change your budget.

- At the top, you’ll see a number of different things you can change: the budget name, the budget year, the starting month, and the currency.

- At the bottom, there are buttons that let you change the categories or accounts you want included in your budget.

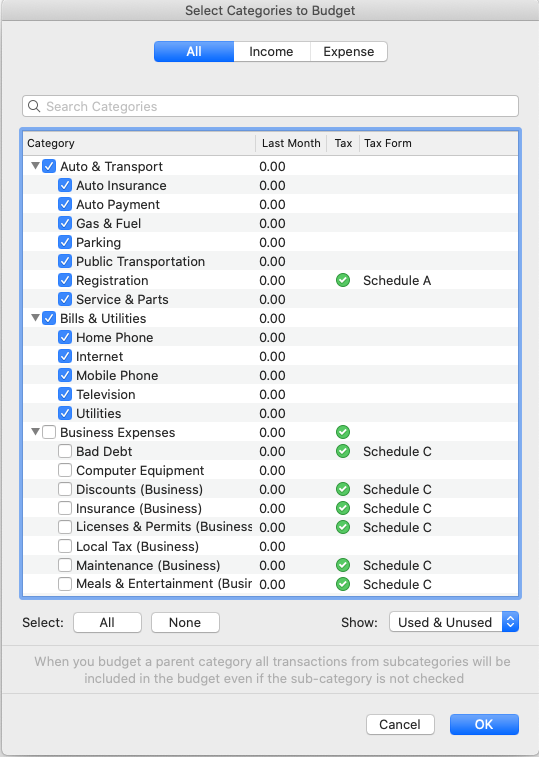
- Click Select Categories to choose the categories you want to track in your budget. For example, you might only want to track your discretionary spending in categories like entertainment and shopping without tracking predictable expenses that don’t change, like your car payment.
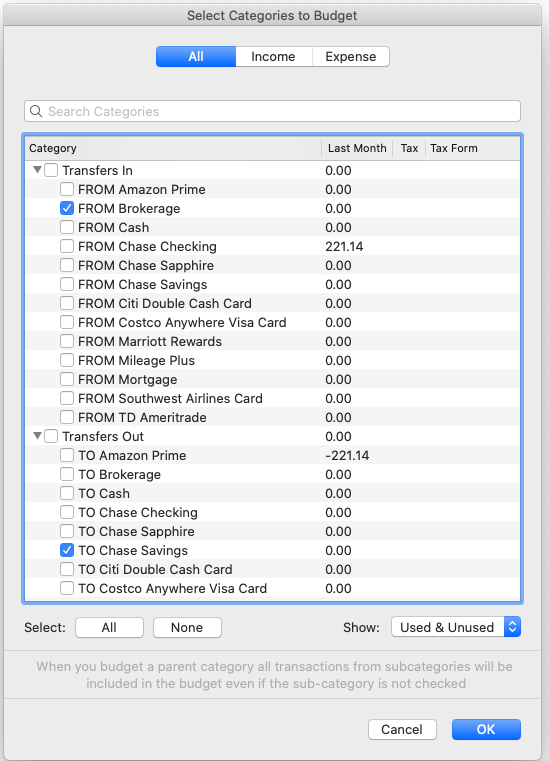
- A new feature we recently added to Quicken for Mac is the ability to budget transfers. Use this if you want to include transfers from one account into another, such as when you contribute to a savings account from your primary bank account, or when you contribute to a college fund account. If you’re retired, you can also use this to track transfers from your retirement account into your primary bank account.
- Click Select Accounts to pick the accounts you want to include in your budget. For example, you might not want to include your investment accounts if you’re using your budget to track your spending. If you have a small business, you might not want to include your business accounts. Quicken lets you choose the accounts that make the most sense for your situation.
- In the middle of the screen is where you set your budgeted amounts for each category for the entire year.
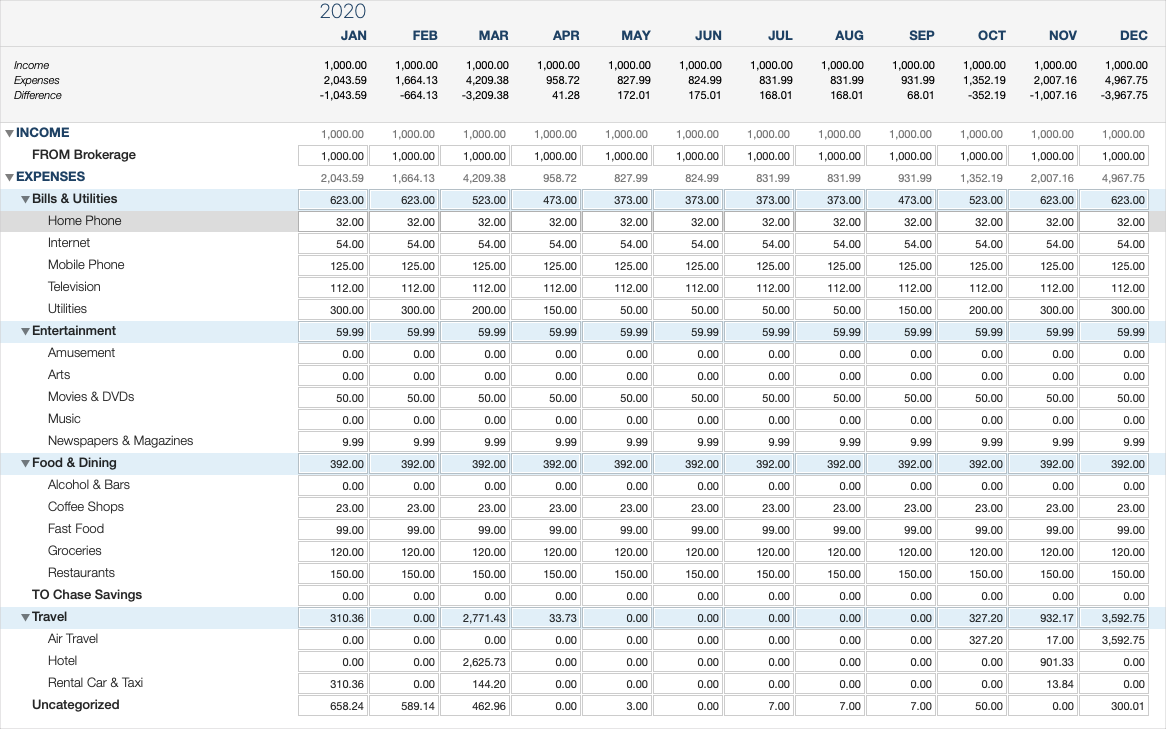
- Click in the box for a particular category and month to change that budgeted amount.
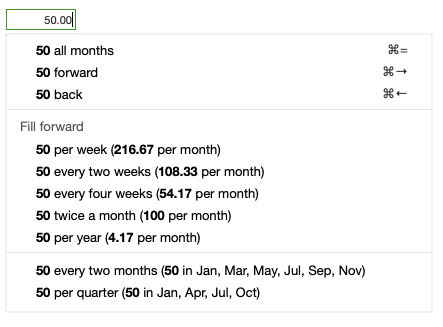
- When you start typing a number, a drop-down menu appears giving you the option to automatically copy that number to all months, or just going forward or backward from the current month. Quicken will also do the math to help you figure out what number to enter into each month based on a familiar interval. For example, if you know you spend $50 every week for bridge tolls, Quicken can enter the monthly amount for you: $216.67. The calculation formulas are built right in.
- When you’re done customizing your budget, click Save to save your changes.
- In the main budget, you can also customize your budget view.
- You can see your budget in a 1-month view or a 12-month view

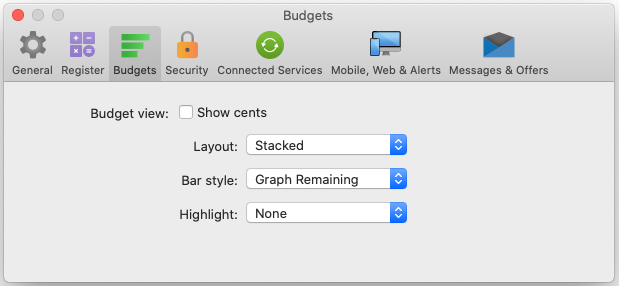
- If you go to Quicken Preferences, you’ll see a number of other options to customize your view, like the ability to see cents, change the layout, change the style of the graph, and control the highlight.
- In the 12-month view, you can also choose to hide the Year-to-Date rollup view if you don’t want to see your totals for the year.

- You can see your budget in a 1-month view or a 12-month view
To share your own unique tips and tricks for using Quicken, join our Quicken Community forums.
Quicken has made the material on this blog available for informational purposes only. Use of this website constitutes agreement to our Terms of Use and Privacy Policy. Quicken does not offer advisory or brokerage services, does not recommend the purchase or sale of any particular securities or other investments, and does not offer tax advice. For any such advice, please consult a professional.

