
Overview
Bill Manager allows you to set Quick Pay and Check Pay payments for a date in the future.
Instructions for Quick Pay
Schedule a Quick Pay payment from the Bills Dashboard
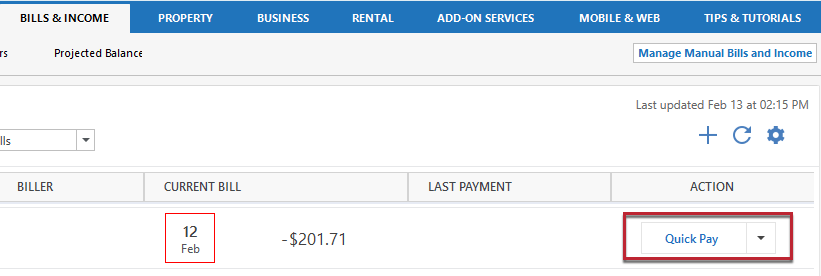
- Go to the Bills & Income tab.
- Click Quick Pay next to the biller you want to pay.
- In the Make a Quick Pay Payment screen, enter the payment and transaction details.
The required information includes:
- Payment Amount: By default, we will display the amount of the bill, but you have the flexibility to pay a different amount. For a credit card bill, you will have the minimum amount, total amount due, and a choice to pay any amount between those two amounts.
- Account to use: Any account that is enabled for Quick Pay Payments.
- Date: Select the date you want the payment to process. The amount of time a payment can be scheduled out is determined by the biller. To avoid any late fees, scheduling the payment two or three days prior to the due date is recommended.
- Category, Tag, and Memo fields: These are used to create the transaction in the register and will help Quicken to create better reports on your payments and transactions.
- Click Schedule.
- Review your payment details, then click Confirm.
- In the Quick Pay Payment is Scheduled screen, click OK.
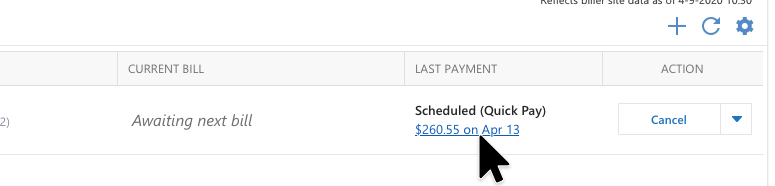
You can view your scheduled payment in the Bills Dashboard in the Last Payment column.
Schedule a Quick Pay payment from the register
- Go to the register for your Quick Pay enabled account.
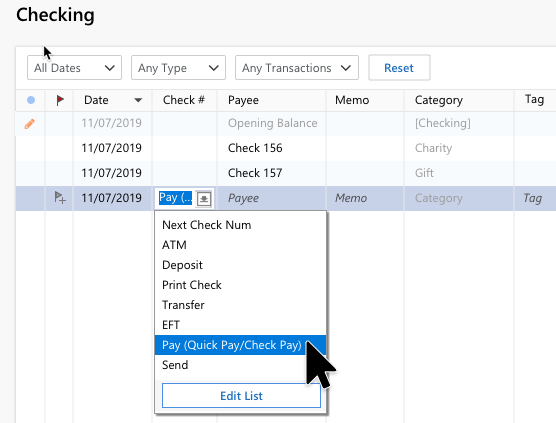
- Select the empty transaction at the bottom of the register.
- Click the drop-down arrow in the Check # field and select Pay (Quick Pay/Check Pay).
- Select the biller you want to schedule the payment for.
- In the Make a Quick Pay Payment screen, enter the payment and transaction details.
The required information includes:
- Payment Amount: By default, we will display the amount of the bill, but you have the flexibility to pay a different amount. For a credit card bill, you will have the minimum amount, total amount due, and a choice to pay any amount between those two amounts.
- Account to use: Any account that is enabled for Quick Pay Payments.
- Date: Select the date you want the payment to process. The amount of time a payment can be scheduled out is determined by the biller. To avoid any late fees, scheduling the payment two or three days prior to the due date is recommended.
- Category, Tag, and Memo fields: These are used to create the transaction in the register and will help Quicken to create better reports on your payments and transactions.
- Click Schedule.
- Review your payment details, then click Confirm.
- In the Quick Pay Payment is Scheduled screen, click OK.
You can view your scheduled payment in the Bills Dashboard in the Last Payment column.
Instructions for Check Pay
Schedule a Check Pay payment from the Bills Dashboard
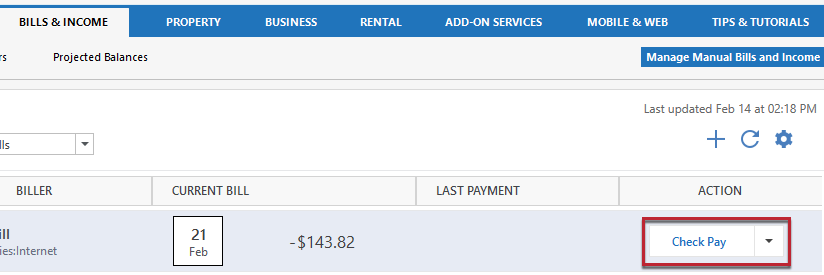
- Go to the Bills & Income tab.
- Click Check Pay next to the biller you want to pay.
- In the Make a Check Pay Payment screen, enter the payment and transaction details.
To make a payment using Check Pay, you need to enter the following information:
- Date: Select the date you want the payment to mail. A payment can be scheduled out a maximum of 45 days. Please take into account the expected delivery date range to ensure your payment arrives by the due date.
- U.S. Postal Service Priority Mail products and First-Class packages may require more time to be delivered due to limited transportation availability as a result of the ongoing Coronavirus Disease (COVID 19) impacts to the United States.
- Account to use: By default, Quicken will use the account that you chose while setting up the reminder. You can choose any other Check Pay-enabled account as well.
- Payment amount: Quicken will display the default amount that was entered when you created the reminder. You can change the amount as needed.
You can optionally enter information for the Category, Tag, and Memo fields. Adding this information will improve Quicken reports about your payments and transactions. If you want the memo to be printed on the physical check, check the box next to Include memo on printed check.
- Click Schedule.
- Review your payment details, then click Confirm.
- In the Check Pay Payment Scheduled screen, click OK.
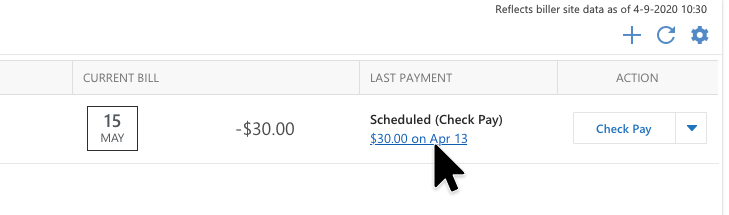
You can view your scheduled payment in the Bills Dashboard in the Last Payment column.
Schedule a Check Pay payment from the register
- Go to the register for your Check Pay enabled account.
- Select the empty transaction at the bottom of the register.
- Click the drop-down arrow in the Check # field and select Pay (Quick Pay/Check Pay).
- Select the biller you want to schedule the payment for.
- In the Make a Check Pay Payment screen, enter the payment and transaction details.
To make a payment using Check Pay, you need to enter the following information:
- Date: Select the date you want the payment to mail. A payment can be scheduled out a maximum of 45 days. Please take into account the expected delivery date range to ensure your payment arrives by the due date.
- U.S. Postal Service Priority Mail products and First-Class packages may require more time to be delivered due to limited transportation availability as a result of the ongoing Coronavirus Disease (COVID 19) impacts to the United States.
- Account to use: By default, Quicken will use the account that you chose while setting up the reminder. You can choose any other Check Pay-enabled account as well.
- Payment amount: Quicken will display the default amount that was entered when you created the reminder. You can change the amount as needed.
You can optionally enter information for the Category, Tag, and Memo fields. Adding this information will improve Quicken reports about your payments and transactions. If you want the memo to be printed on the physical check, check the box next to Include memo on printed check.
- Click Schedule.
- Review your payment details, then click Confirm.
- In the Check Pay Payment Scheduled screen, click OK
You can view your scheduled payment in the Bills Dashboard in the Last Payment column.
